Fix Wi-Fi Not Showing & No Internet Error in Windows 11 is one of the most common problems faced by Windows users today. Many users complain that Wi-Fi option disappears, shows No Internet, or the system does not detect any wireless network at all. This issue can occur after a Windows update, driver problem, incorrect network settings, or hardware conflicts.
In this detailed guide, you’ll learn how to fix Wi-Fi not showing and no internet error in Windows 11 step by step, using beginner-friendly and advanced troubleshooting methods. Follow this guide carefully and your Wi-Fi issue will be resolved in most cases.
Windows 11 is the latest desktop operating system developed by Microsoft. It is designed to be more modern, secure, faster, and user-friendly than previous versions like Windows 10. Windows 11 is mainly used on PCs, laptops, and tablets to run applications, browse the internet, play games, and manage files. In simple words, Windows 11 is the software that allows you to use your computer easily.
Why Windows 11 Was Introduced?
Microsoft introduced Windows 11 to:
- Improve performance and speed
- Provide a cleaner and modern design
- Enhance security against modern cyber threats
- Support new hardware and technologies
- Improve multitasking and productivity
Key Features of Windows 11
1. New Start Menu & Taskbar
- Center-aligned Start Menu
- Clean and simplified design
- Faster app access
2. Better Performance
- Faster boot time
- Improved battery efficiency
- Optimized for SSDs and new processors
3. Enhanced Multitasking (Snap Layouts)
- Easily split screen into multiple layouts
- Perfect for work, study, and productivity
4. Improved Security
- Built-in antivirus (Windows Security)
- Secure Boot & TPM 2.0 support
- Better protection against malware and hacking
5. Gaming Improvements
- DirectStorage for faster game loading
- Auto HDR for better graphics
- Xbox integration
System Requirements for Windows 11 (Basic)
- 64-bit processor
- Minimum 4GB RAM
- 64GB storage
- TPM 2.0
- Secure Boot enabled
(Older PCs may not support Windows 11)
Advantages of Windows 11
✅ Modern & attractive UI
✅ Faster than Windows 10
✅ Better security
✅ Great for gaming & work
✅ Touch and keyboard-friendly
Disadvantages of Windows 11
❌Not supported on old PCs
❌ Requires TPM 2.0
❌ Some old software may not work
Who Should Use Windows 11?
- Students
- Office workers
- Gamers
- Content creators
- Anyone buying a new PC or laptop
Windows 10 vs Windows 11 (Quick Comparison)
| Feature | Windows 10 | Windows 11 |
| Interface | Traditional | Modern |
| Performance | Good | Better |
| Security | Standard | Advanced |
| Gaming | Normal | Improved |
- Windows 11 Wi-Fi not showing
- No Internet access Windows 11
- Windows 11 Wi-Fi missing
- Fix Wi-Fi problem in Windows 11
- Windows 11 network troubleshooting
Table of Contents
Why Wi-Fi Is Not Showing or No Internet in Windows 11?
Before jumping into fixes, it’s important to understand the root causes:
- Corrupted or outdated Wi-Fi drivers
- Windows 11 update bugs
- Disabled WLAN services
- Network adapter issues
- DNS or IP configuration problems
- Router or modem faults
Understanding the reason helps you apply the correct solution.
Fix Wi-Fi Not Showing & No Internet Error in Windows 11 (Step by Step)
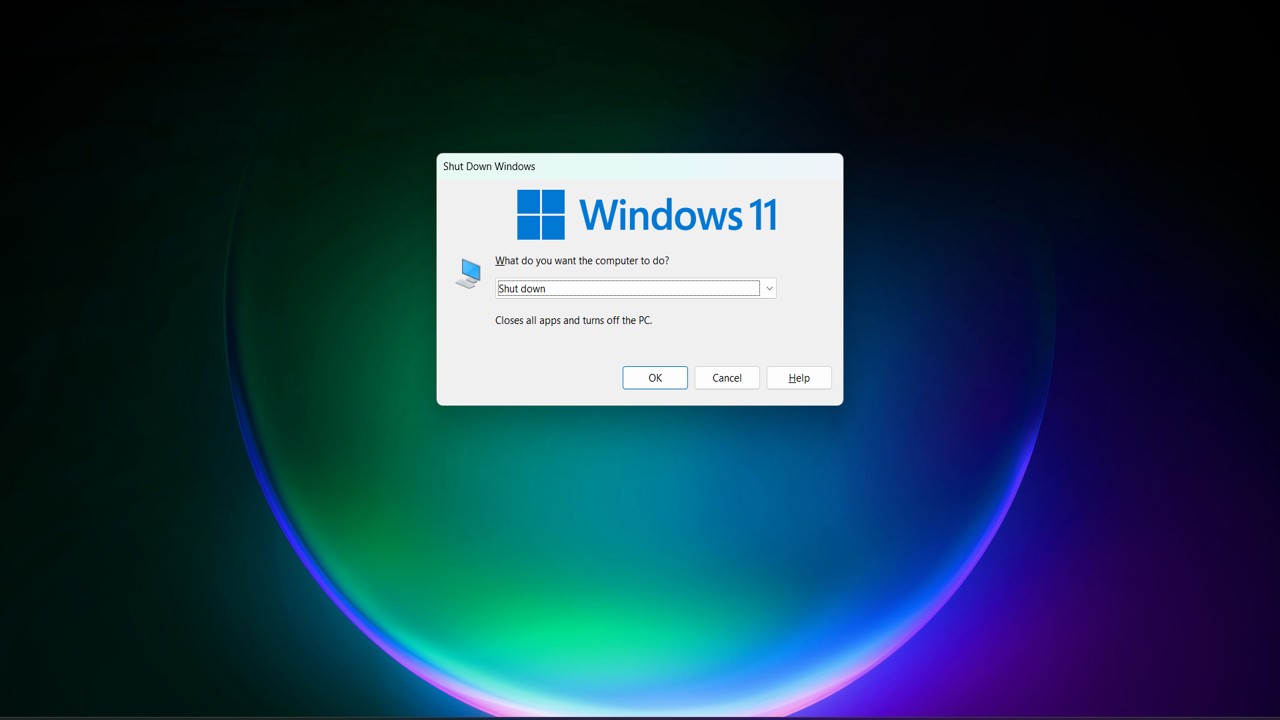
Step 1 – Restart Your PC and Router
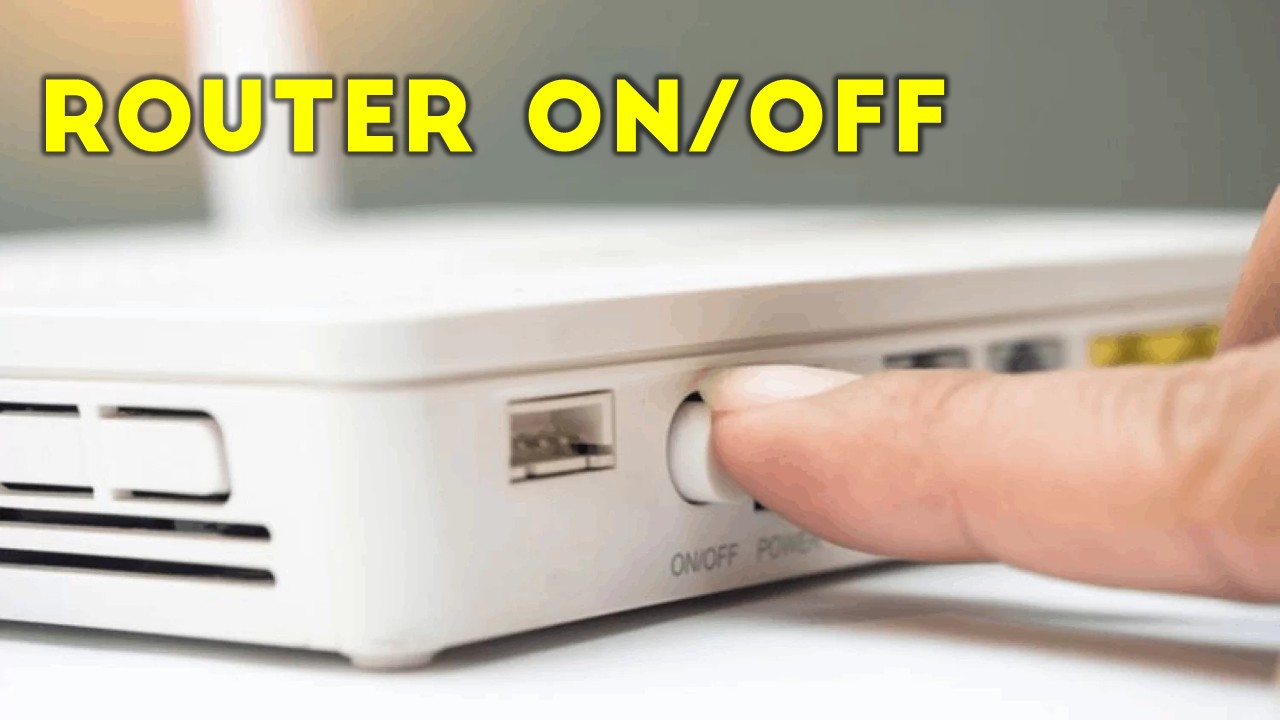
Sometimes the simplest fix works.
Steps:
- Restart your Windows 11 computer
2. Turn off your Wi-Fi router
3. Wait for 30 seconds
4. Turn it back on
If Wi-Fi still doesn’t appear, continue to the next step.
Step 2 – Check If Wi-Fi Is Enabled

Steps:
- Press Windows + I → Open Settings
- Go to Network & Internet
- Click Wi-Fi
Make sure Wi-Fi is turned ON
Step 3 – Enable Network Adapter
Steps:
- Press Windows + R
- Type ncpa.cpl and press Enter
- Right-click on Wi-Fi Adapter
- Click Enable
Step 4 – Run Windows Network Troubleshooter
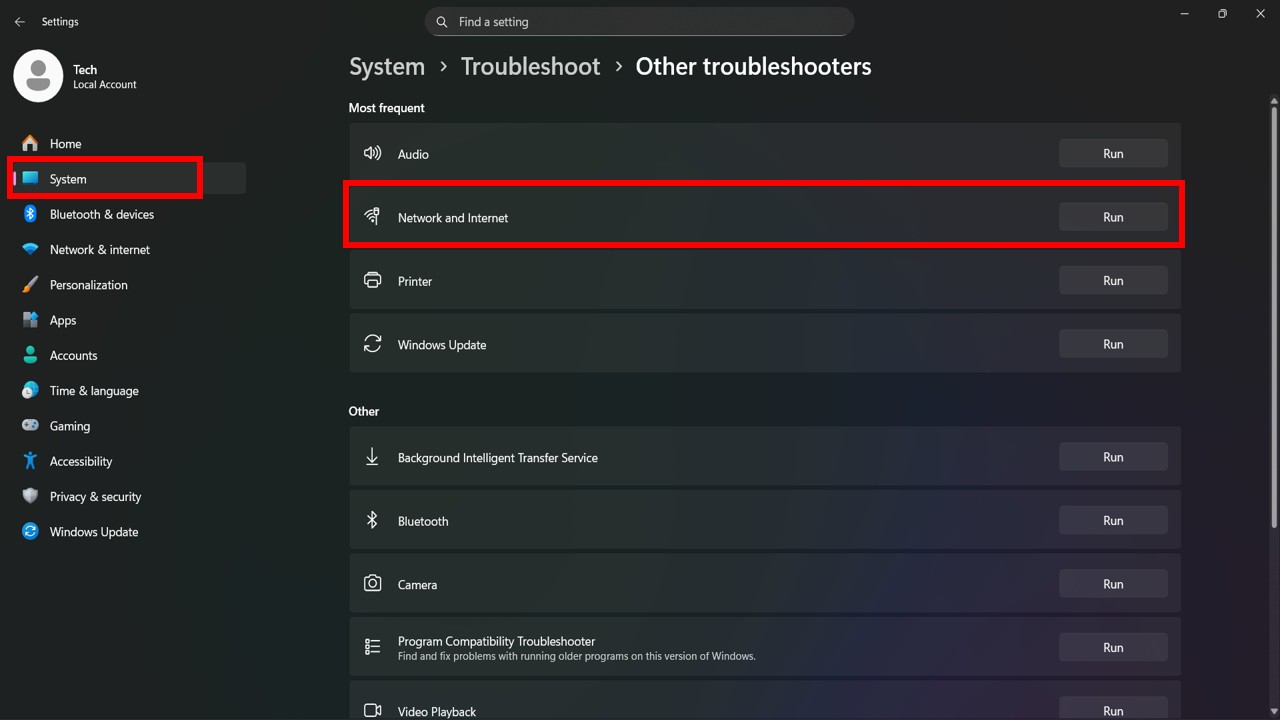
Steps:
- Open Settings
- Go to System → Troubleshoot → Other troubleshooters
- Click Run next to Network Adapter
Windows will automatically detect and fix common issues.
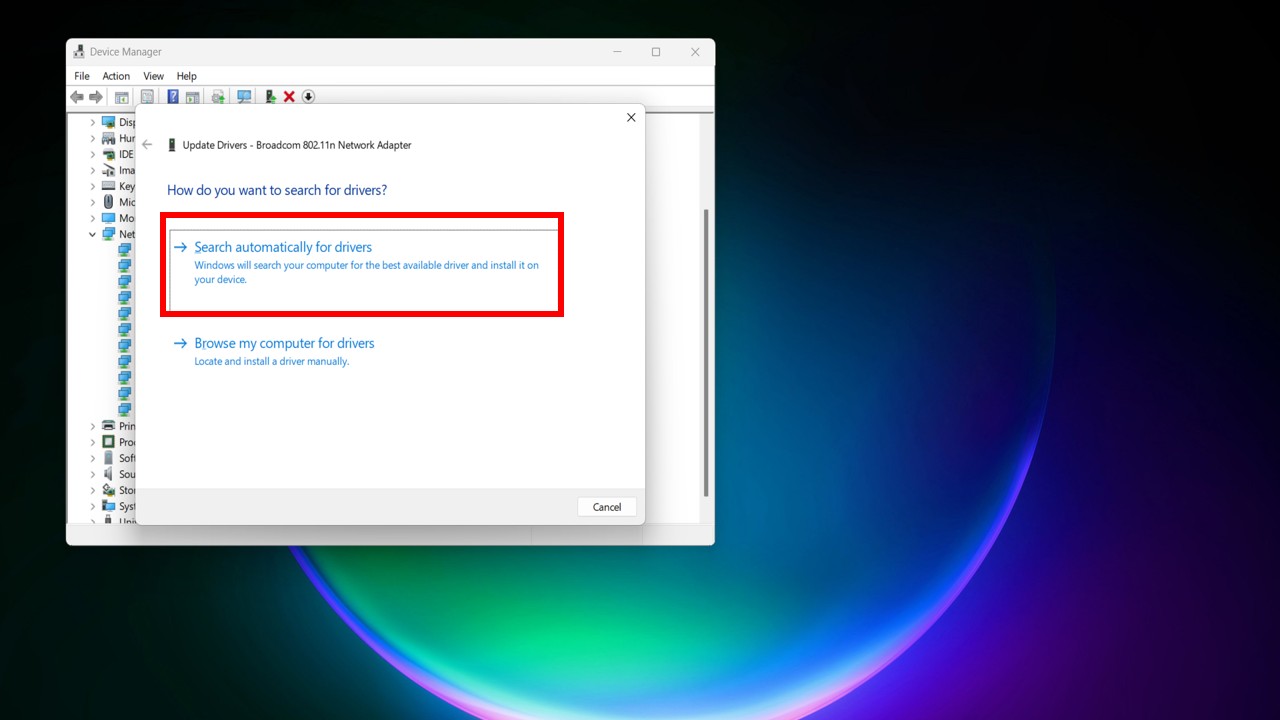
Step 5 – Update Wi-Fi Driver
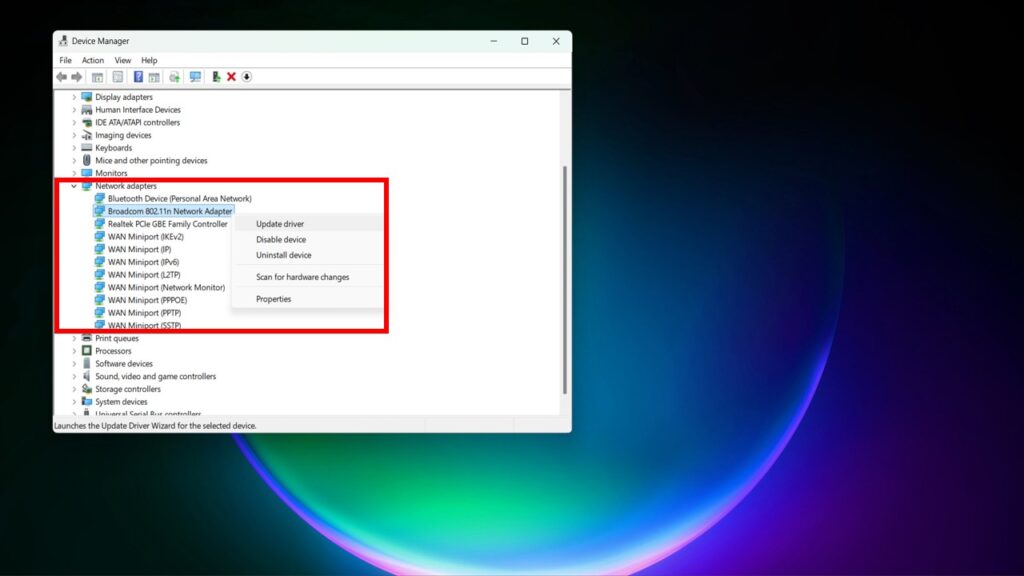
Outdated drivers are a major cause.
Steps:
- Press Windows + X → Device Manager
- Expand Network adapters
- Right-click your Wi-Fi adapter
- Click Update driver
- Select Search automatically for drivers
Step 6 – Reinstall Wi-Fi Driver
Steps:
- Open Device Manager
- Right-click Wi-Fi adapter
- Click Uninstall device
- Restart your PC
Windows will reinstall the driver automatically.
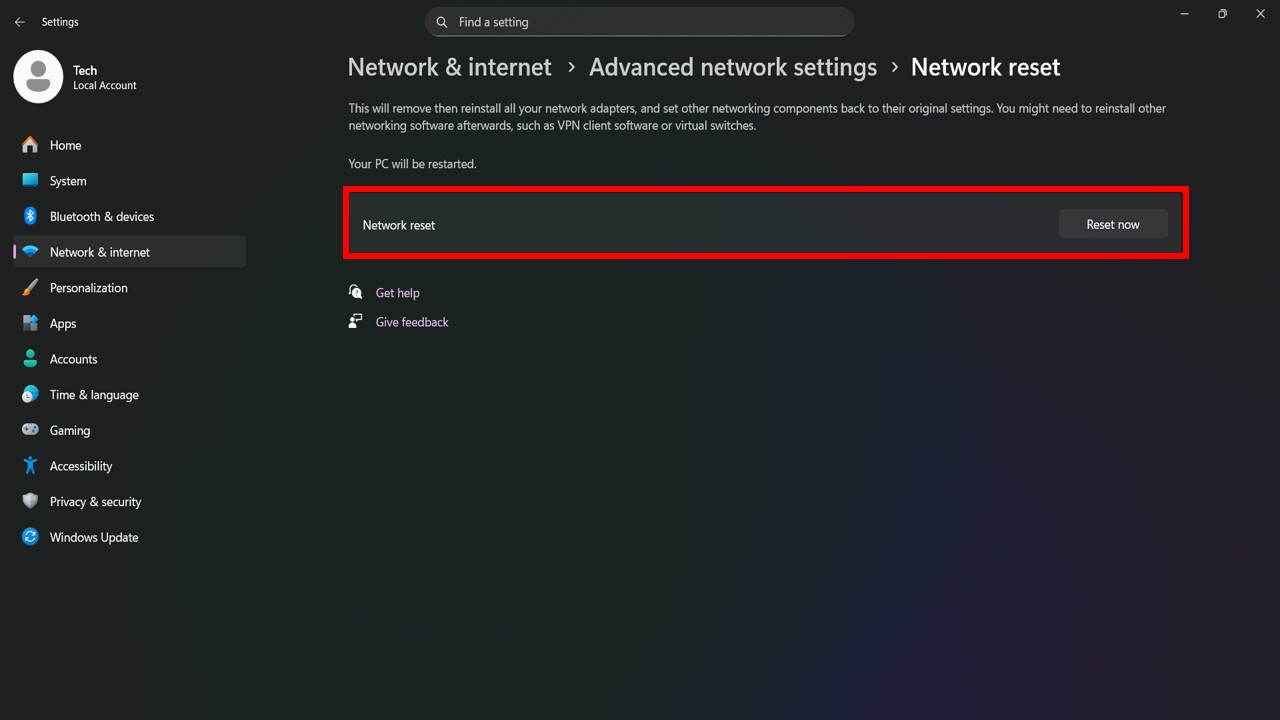
Step 7 – Reset Network Settings
Steps:
- Go to Settings → Network & Internet
- Click Advanced network settings
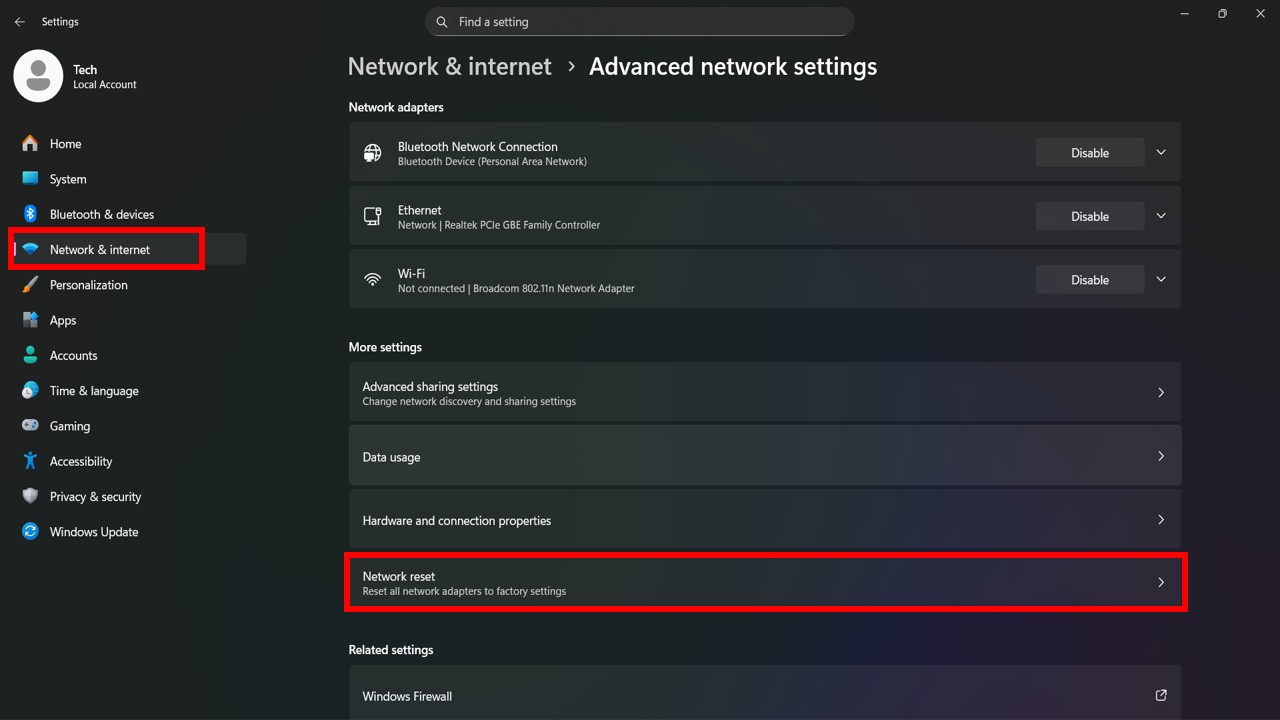
3. Select Network reset
4. Click Reset now
⚠️This will remove saved Wi-Fi passwords.
Step 8 – Fix DNS & IP Using Command Prompt
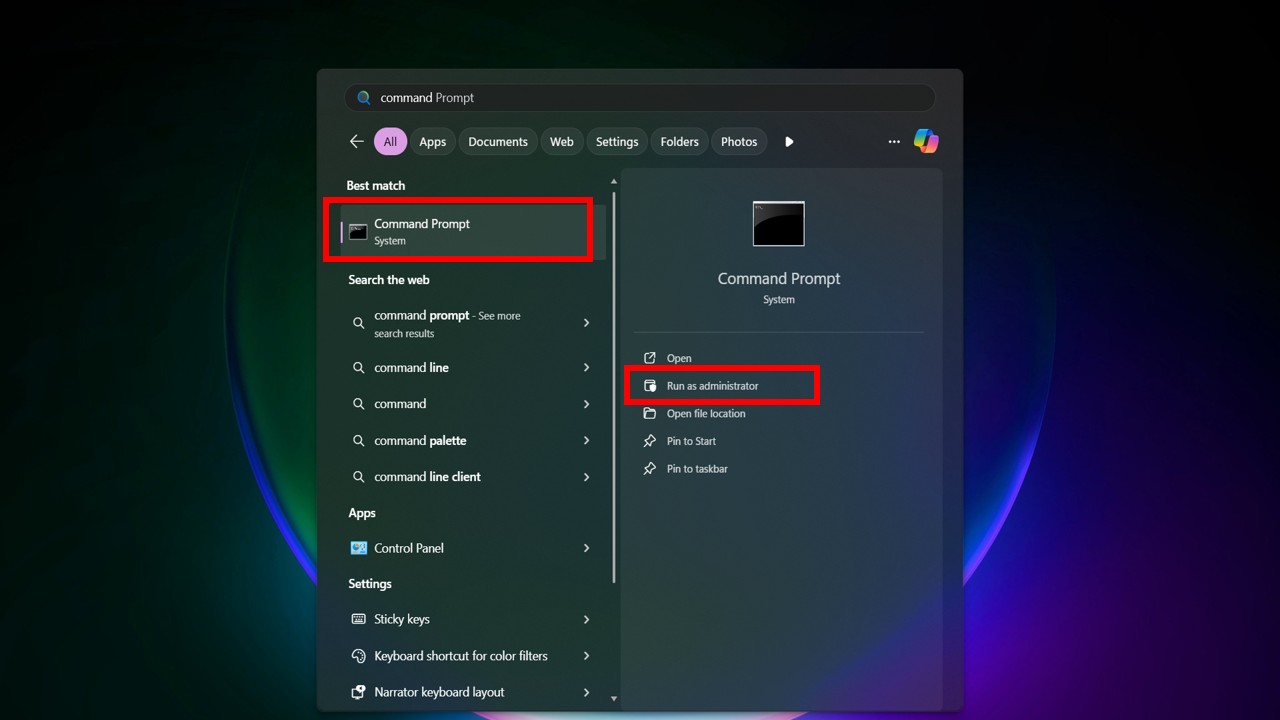
Steps:
- Search CMD → Run as Administrator
- Enter commands one by one:
ipconfig /release
ipconfig /flushdns
ipconfig /renew
netshintip reset
Restart your PC after executing commands.
Advanced Fixes for Windows 11 Wi-Fi Issues
- Update Windows 11 to latest version
- Disable VPN temporarily
- Check BIOS Wi-Fi settings
- Perform System Restore
👉 Read More:
📺Watch Step-by-Step Video Tutorial on My YouTube Channel:
How to Fix Wi-Fi Automatic Disconnect & Connect But No Internet Problem in Windows 11
FAQs – Fix Wi-Fi Not Showing & No Internet Error in Windows 11
Q1: Why Wi-Fi option disappears in Windows 11?
A: Mostly due to driver issues, disabled services, or Windows update bugs.
Q2: Does network reset fix Windows 11 Wi-Fi problem?
A: Yes, network reset fixes most configuration-related Wi-Fi errors.
Q3: Is Windows 11 Wi-Fi issue common?
A: Yes, especially after updates or driver conflicts.
Q4: Should I reinstall Windows 11 to fix Wi-Fi?
A: Reinstall only if all other solutions fail.
Conclusion
Fix Wi-Fi Not Showing & No Internet Error in Windows 11 is completely possible by following the right steps. This guide covers basic to advanced solutions, making it perfect for beginners and professionals. Apply each step carefully, add relevant images at marked places, and your article will be Google-ranking ready🚀.
Pingback: How to Fix Zoom Stuck on Connection in Windows 11
Pingback: How to Create Windows 11 25H2 Bootable USB Drive